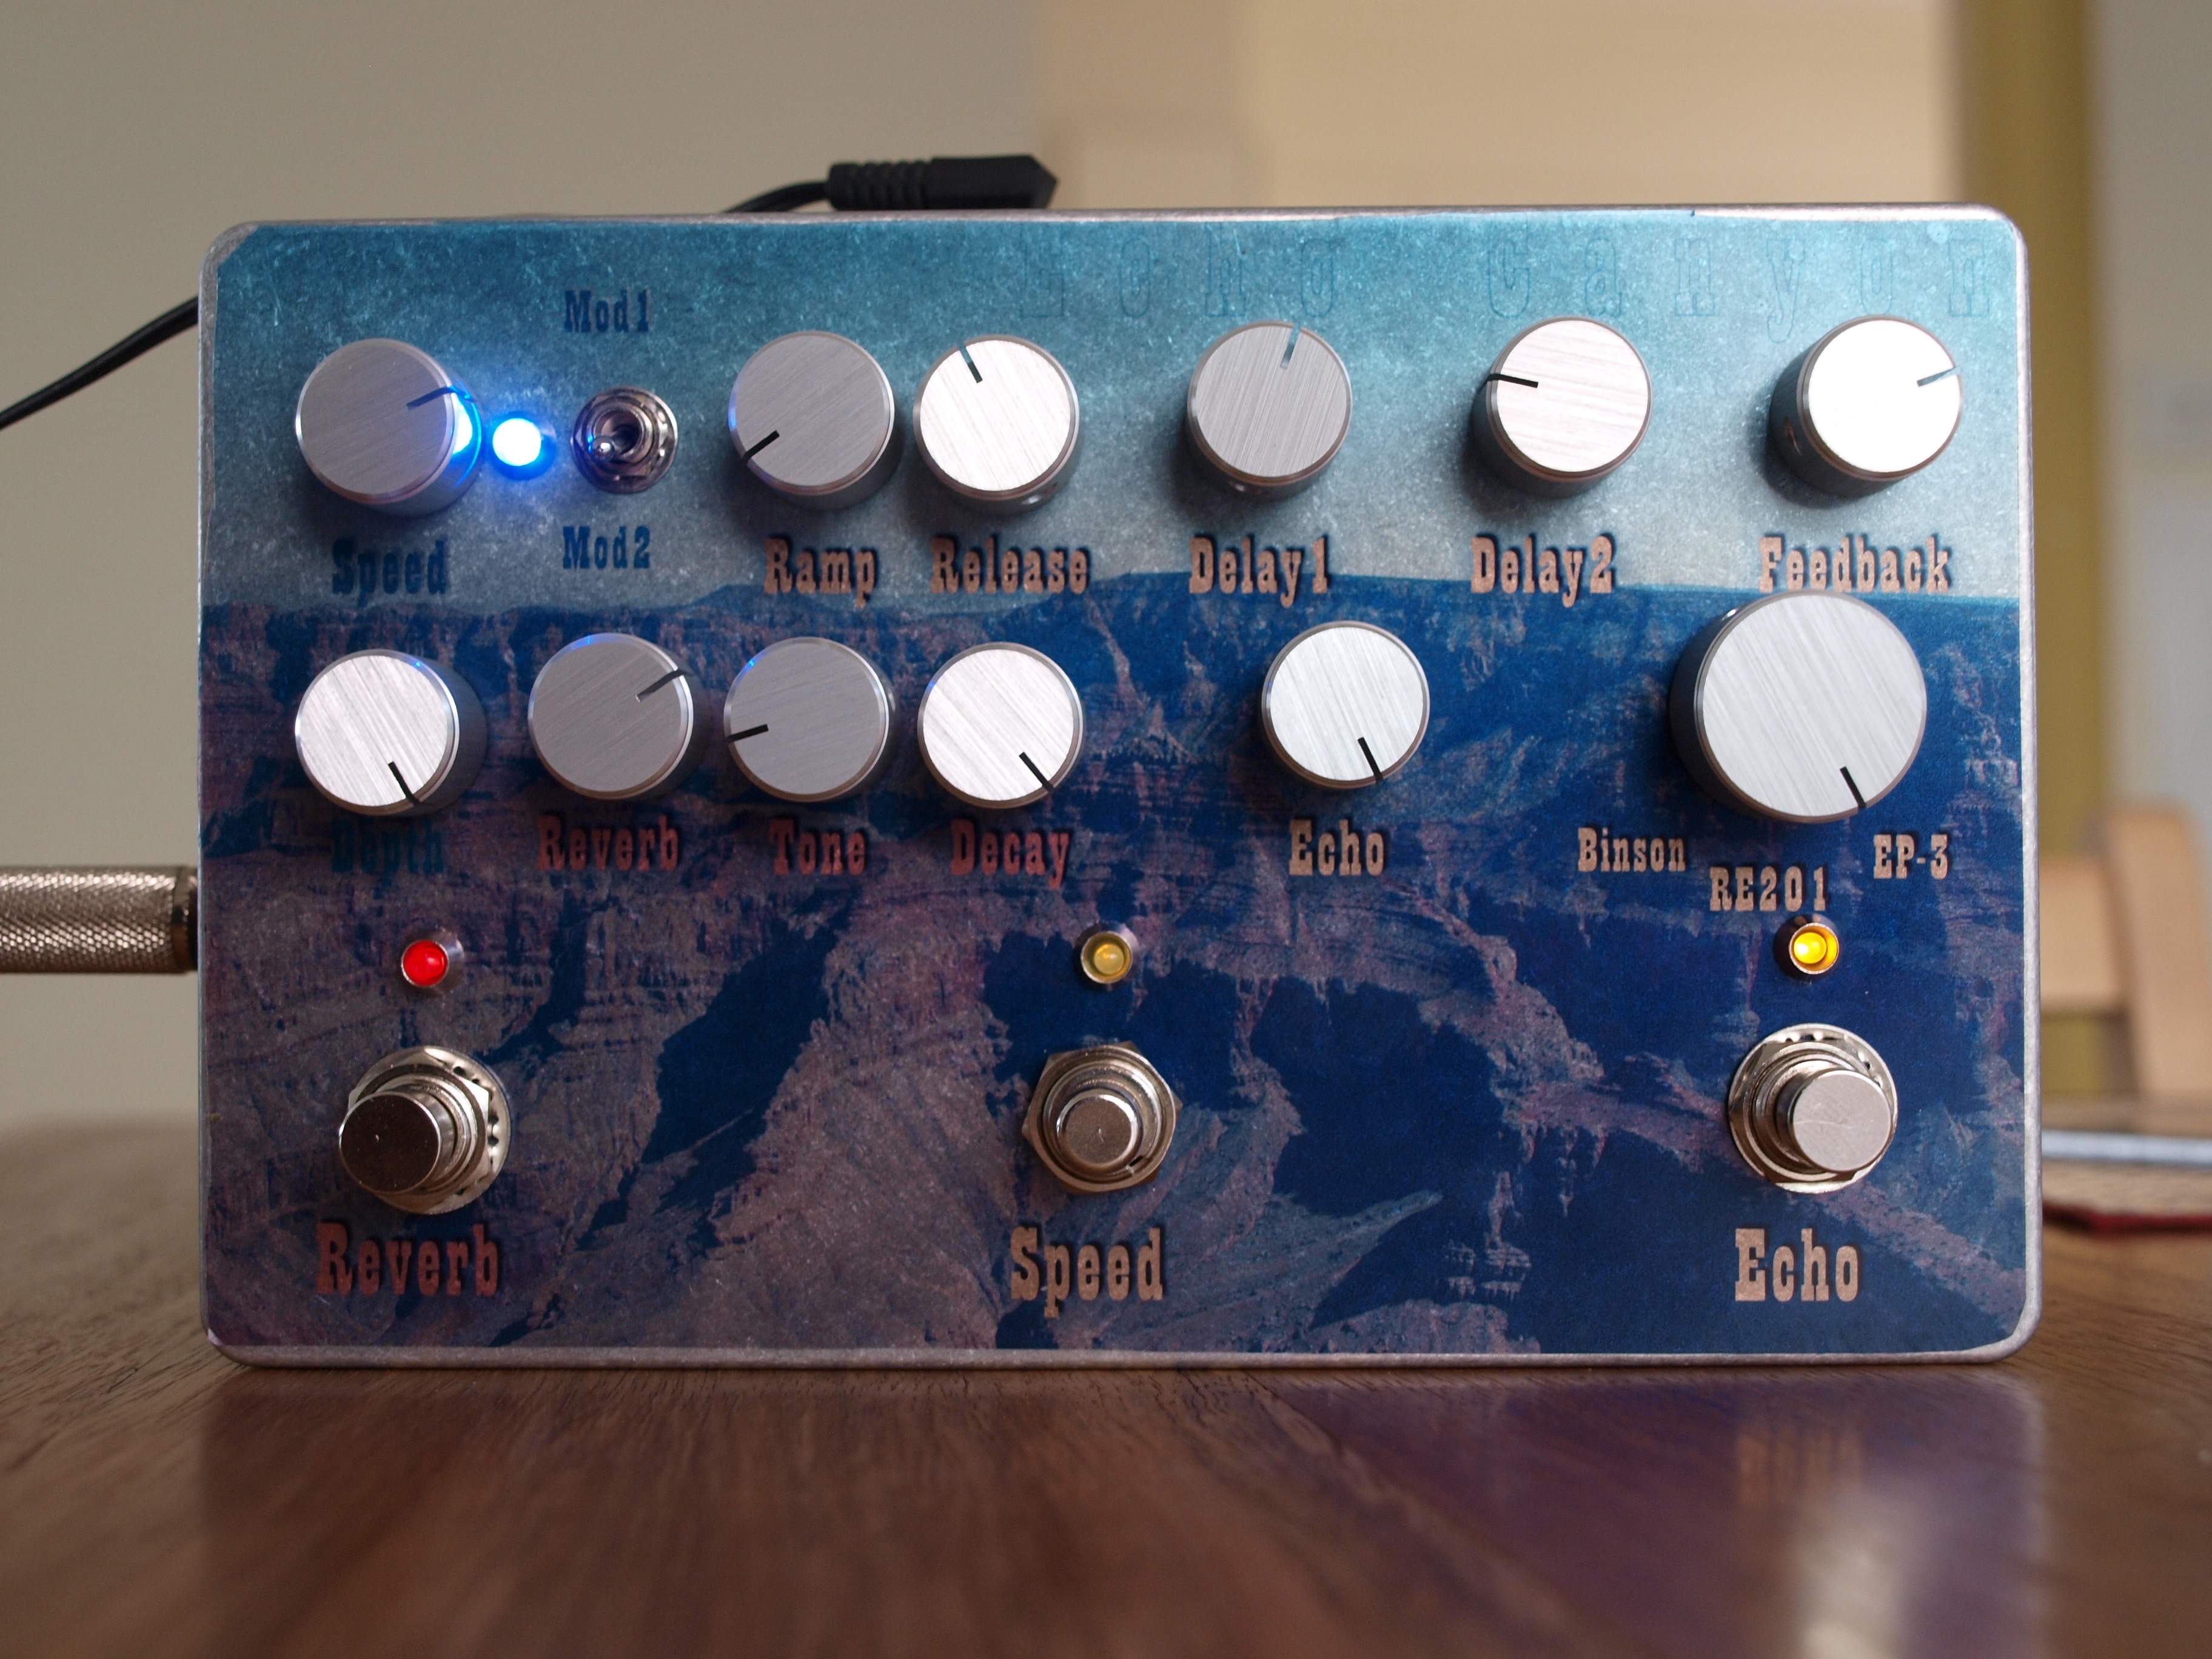
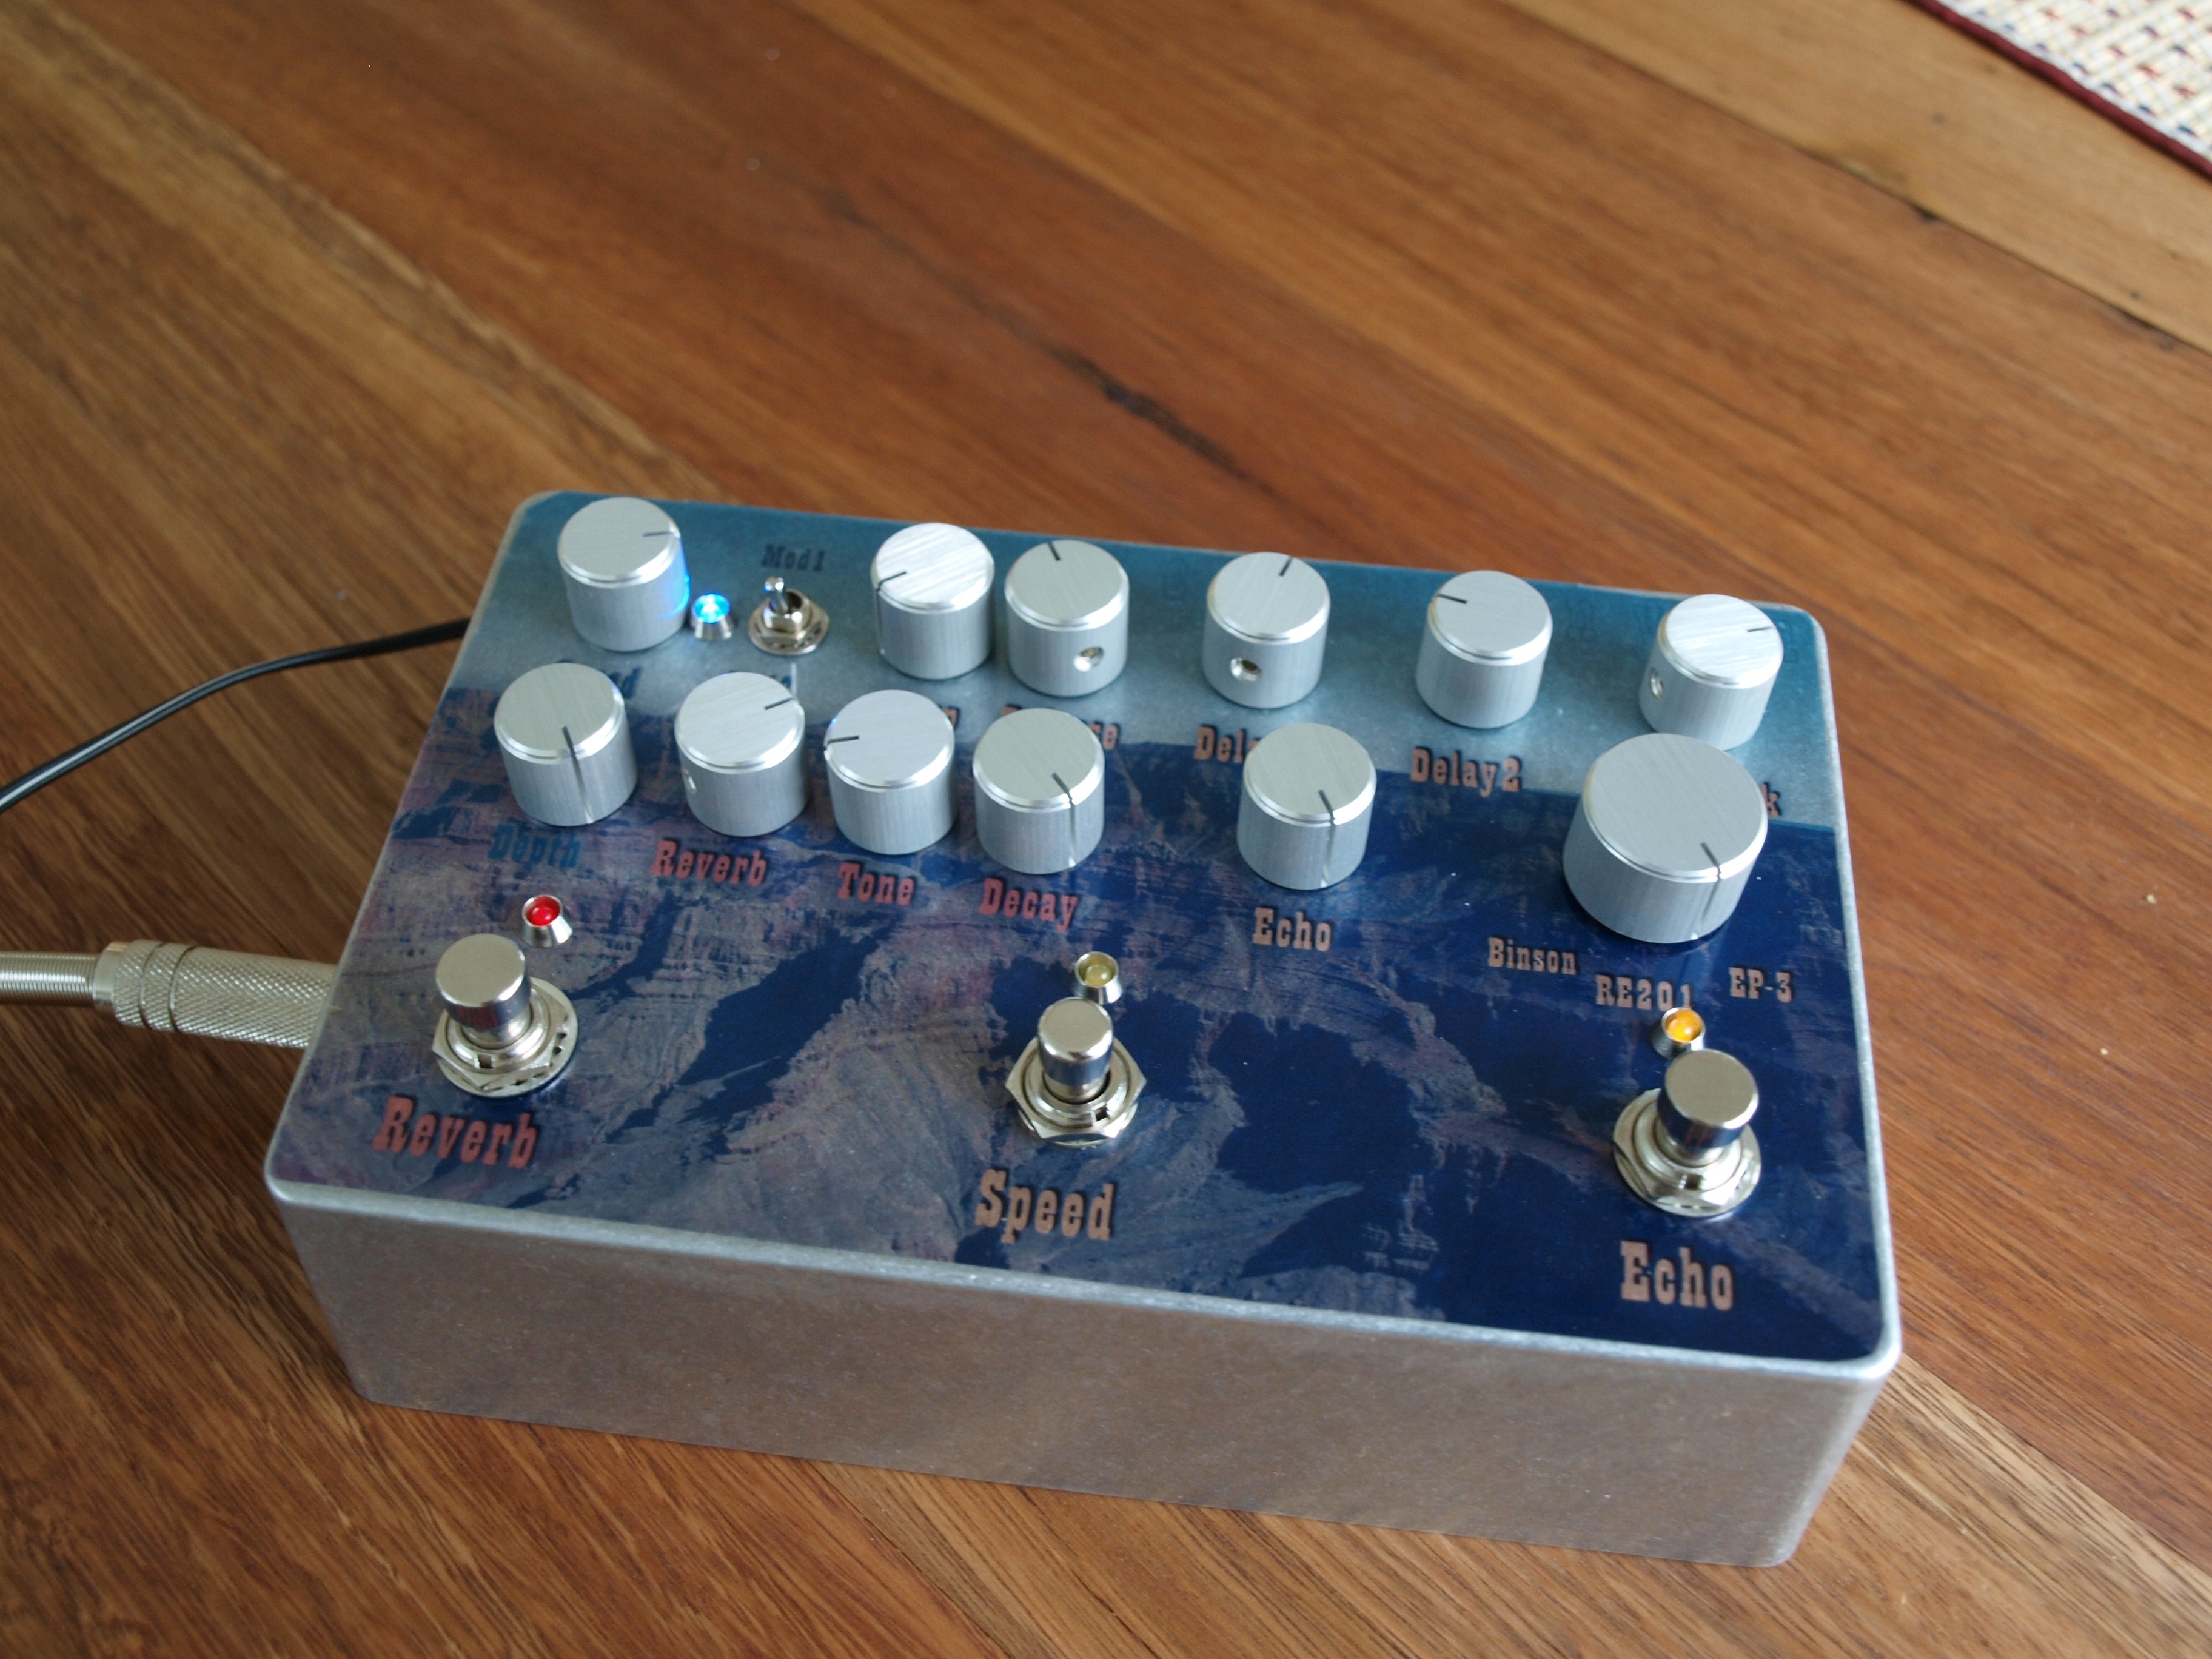
Echo Canyon
Category: Pedals
2016-09-10 20:52:05
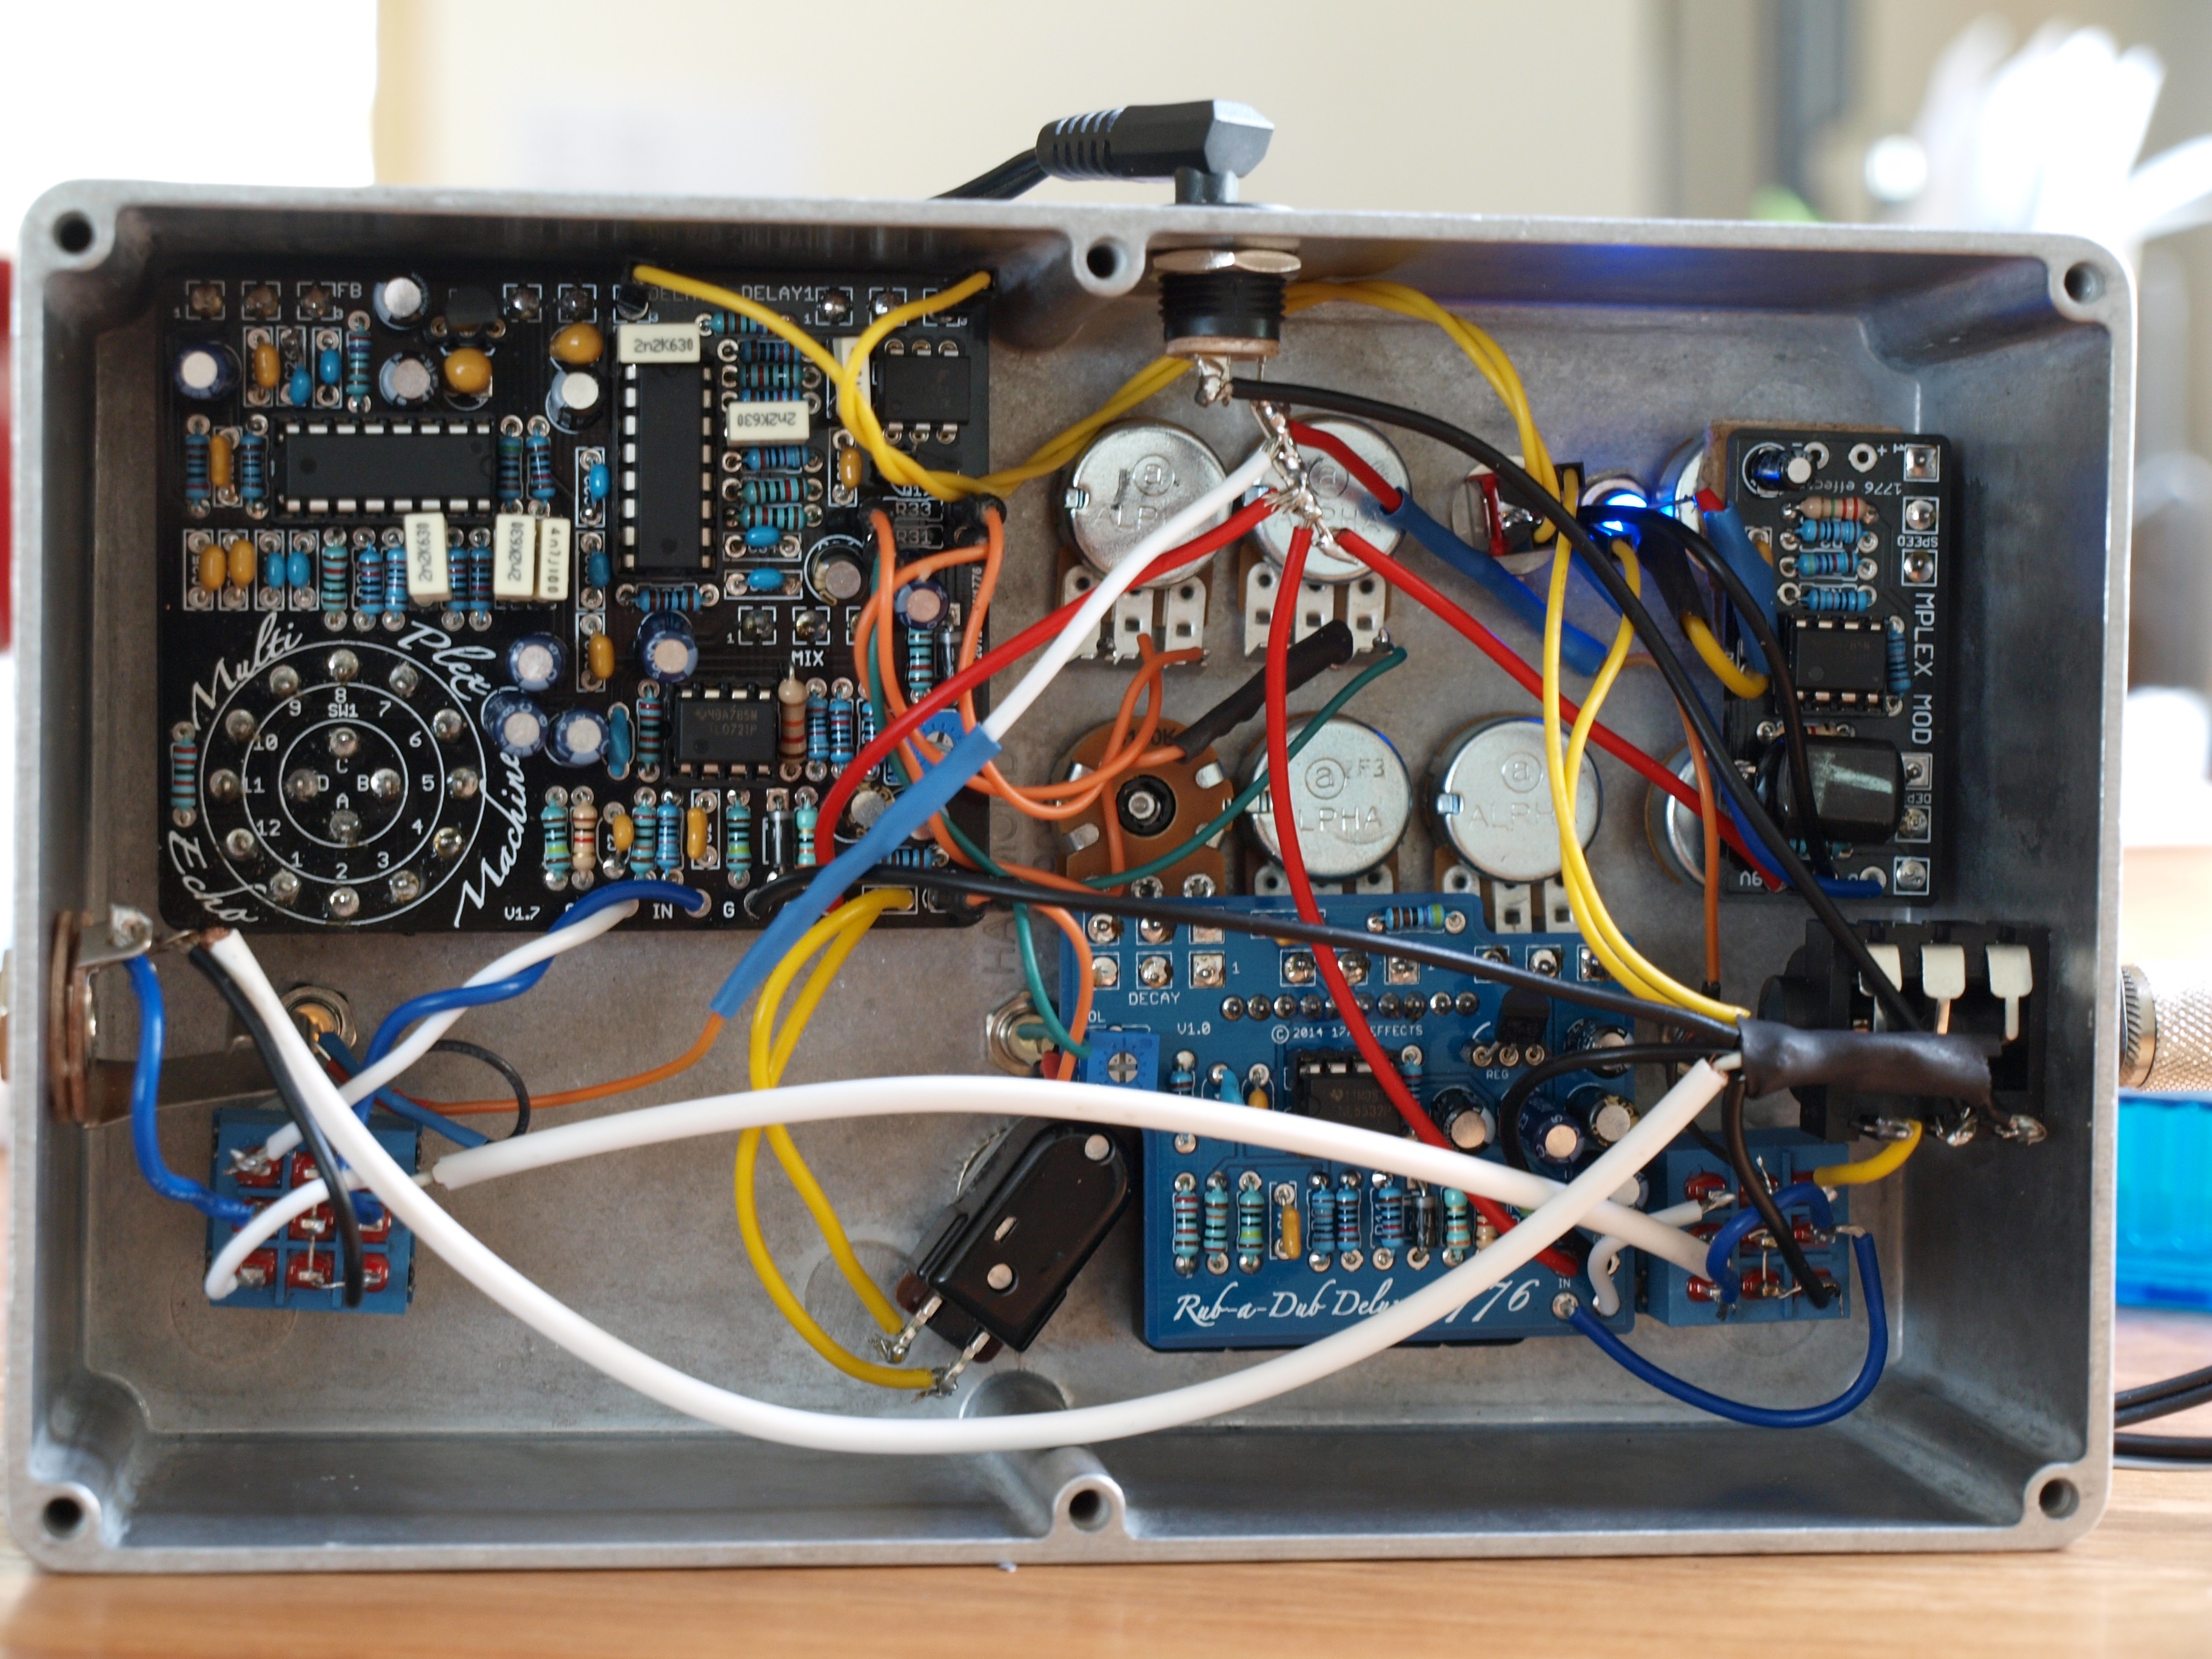
Recently finished a build that contains three boards from http://1776effects.com: the Multiplex Echo Machine, a Rub-a-Dub Deluxe, and the MP Modulation add-on board. The soldering was basically done a few weeks ago, but then I took a break from it before finding that one final dodgy solder joint that needed fixing. It now works a treat!
The build went pretty well. I used it as a 'learn to solder' project for my 9 year old, and he ended up doing all the resistors, capacitors and socket soldering on all three boards, over the space of a few weekends. There were a lot of components to solder, so he got lots of practice.
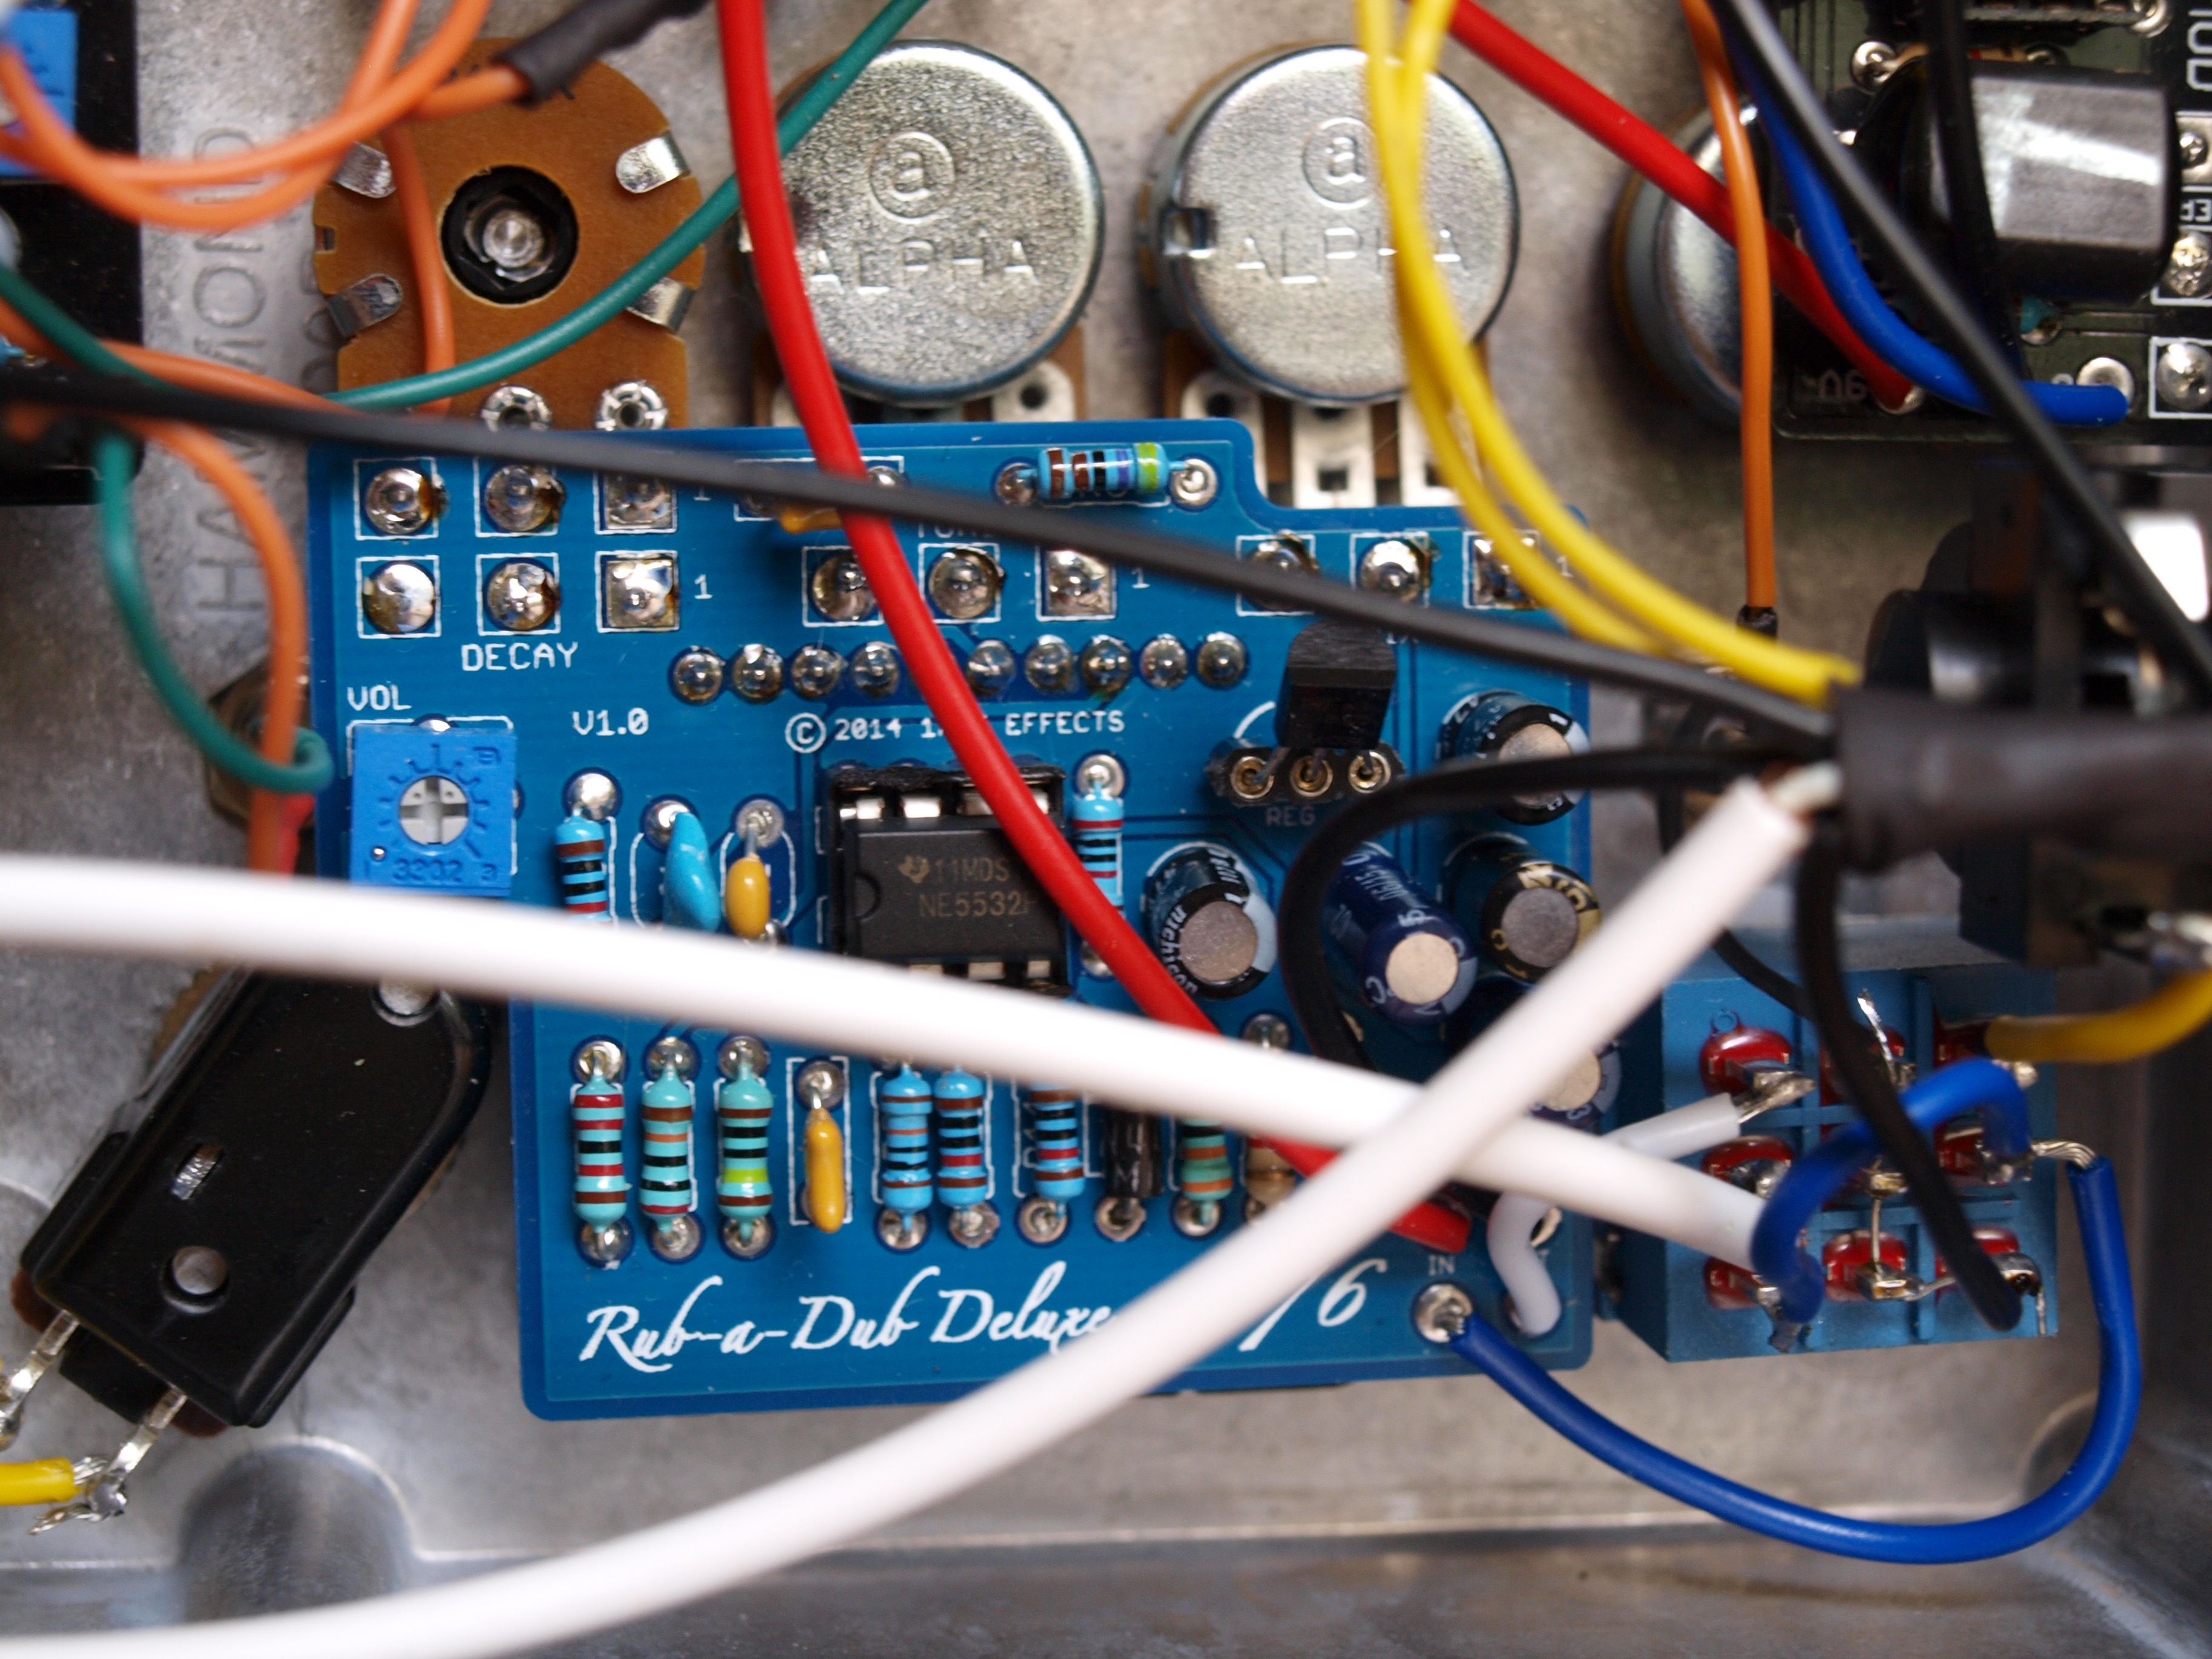
Rub-a-Dub Deluxe
We started with the reverb part of the pedal. This was pretty straight forward, apart from the nerve racking concept of soldering the final part right across the bottom of everything else. No chance for fixing stuff ups after that point.
It worked first try, but the next day when I hooked it up again the reverb was gone. With a TL072 chip, there was no sound at all, and with a NE5532 it was only giving the dry signal. After much stressing and replacing all the socketed parts, finally thought to check the battery. The battery was slightly flat, reading about 7v, and it seems that the reverb chip needs full power to get out of bed. Lesson learned - use a power supply with this pedal, don't include a battery.
Multiplex Echo Machine
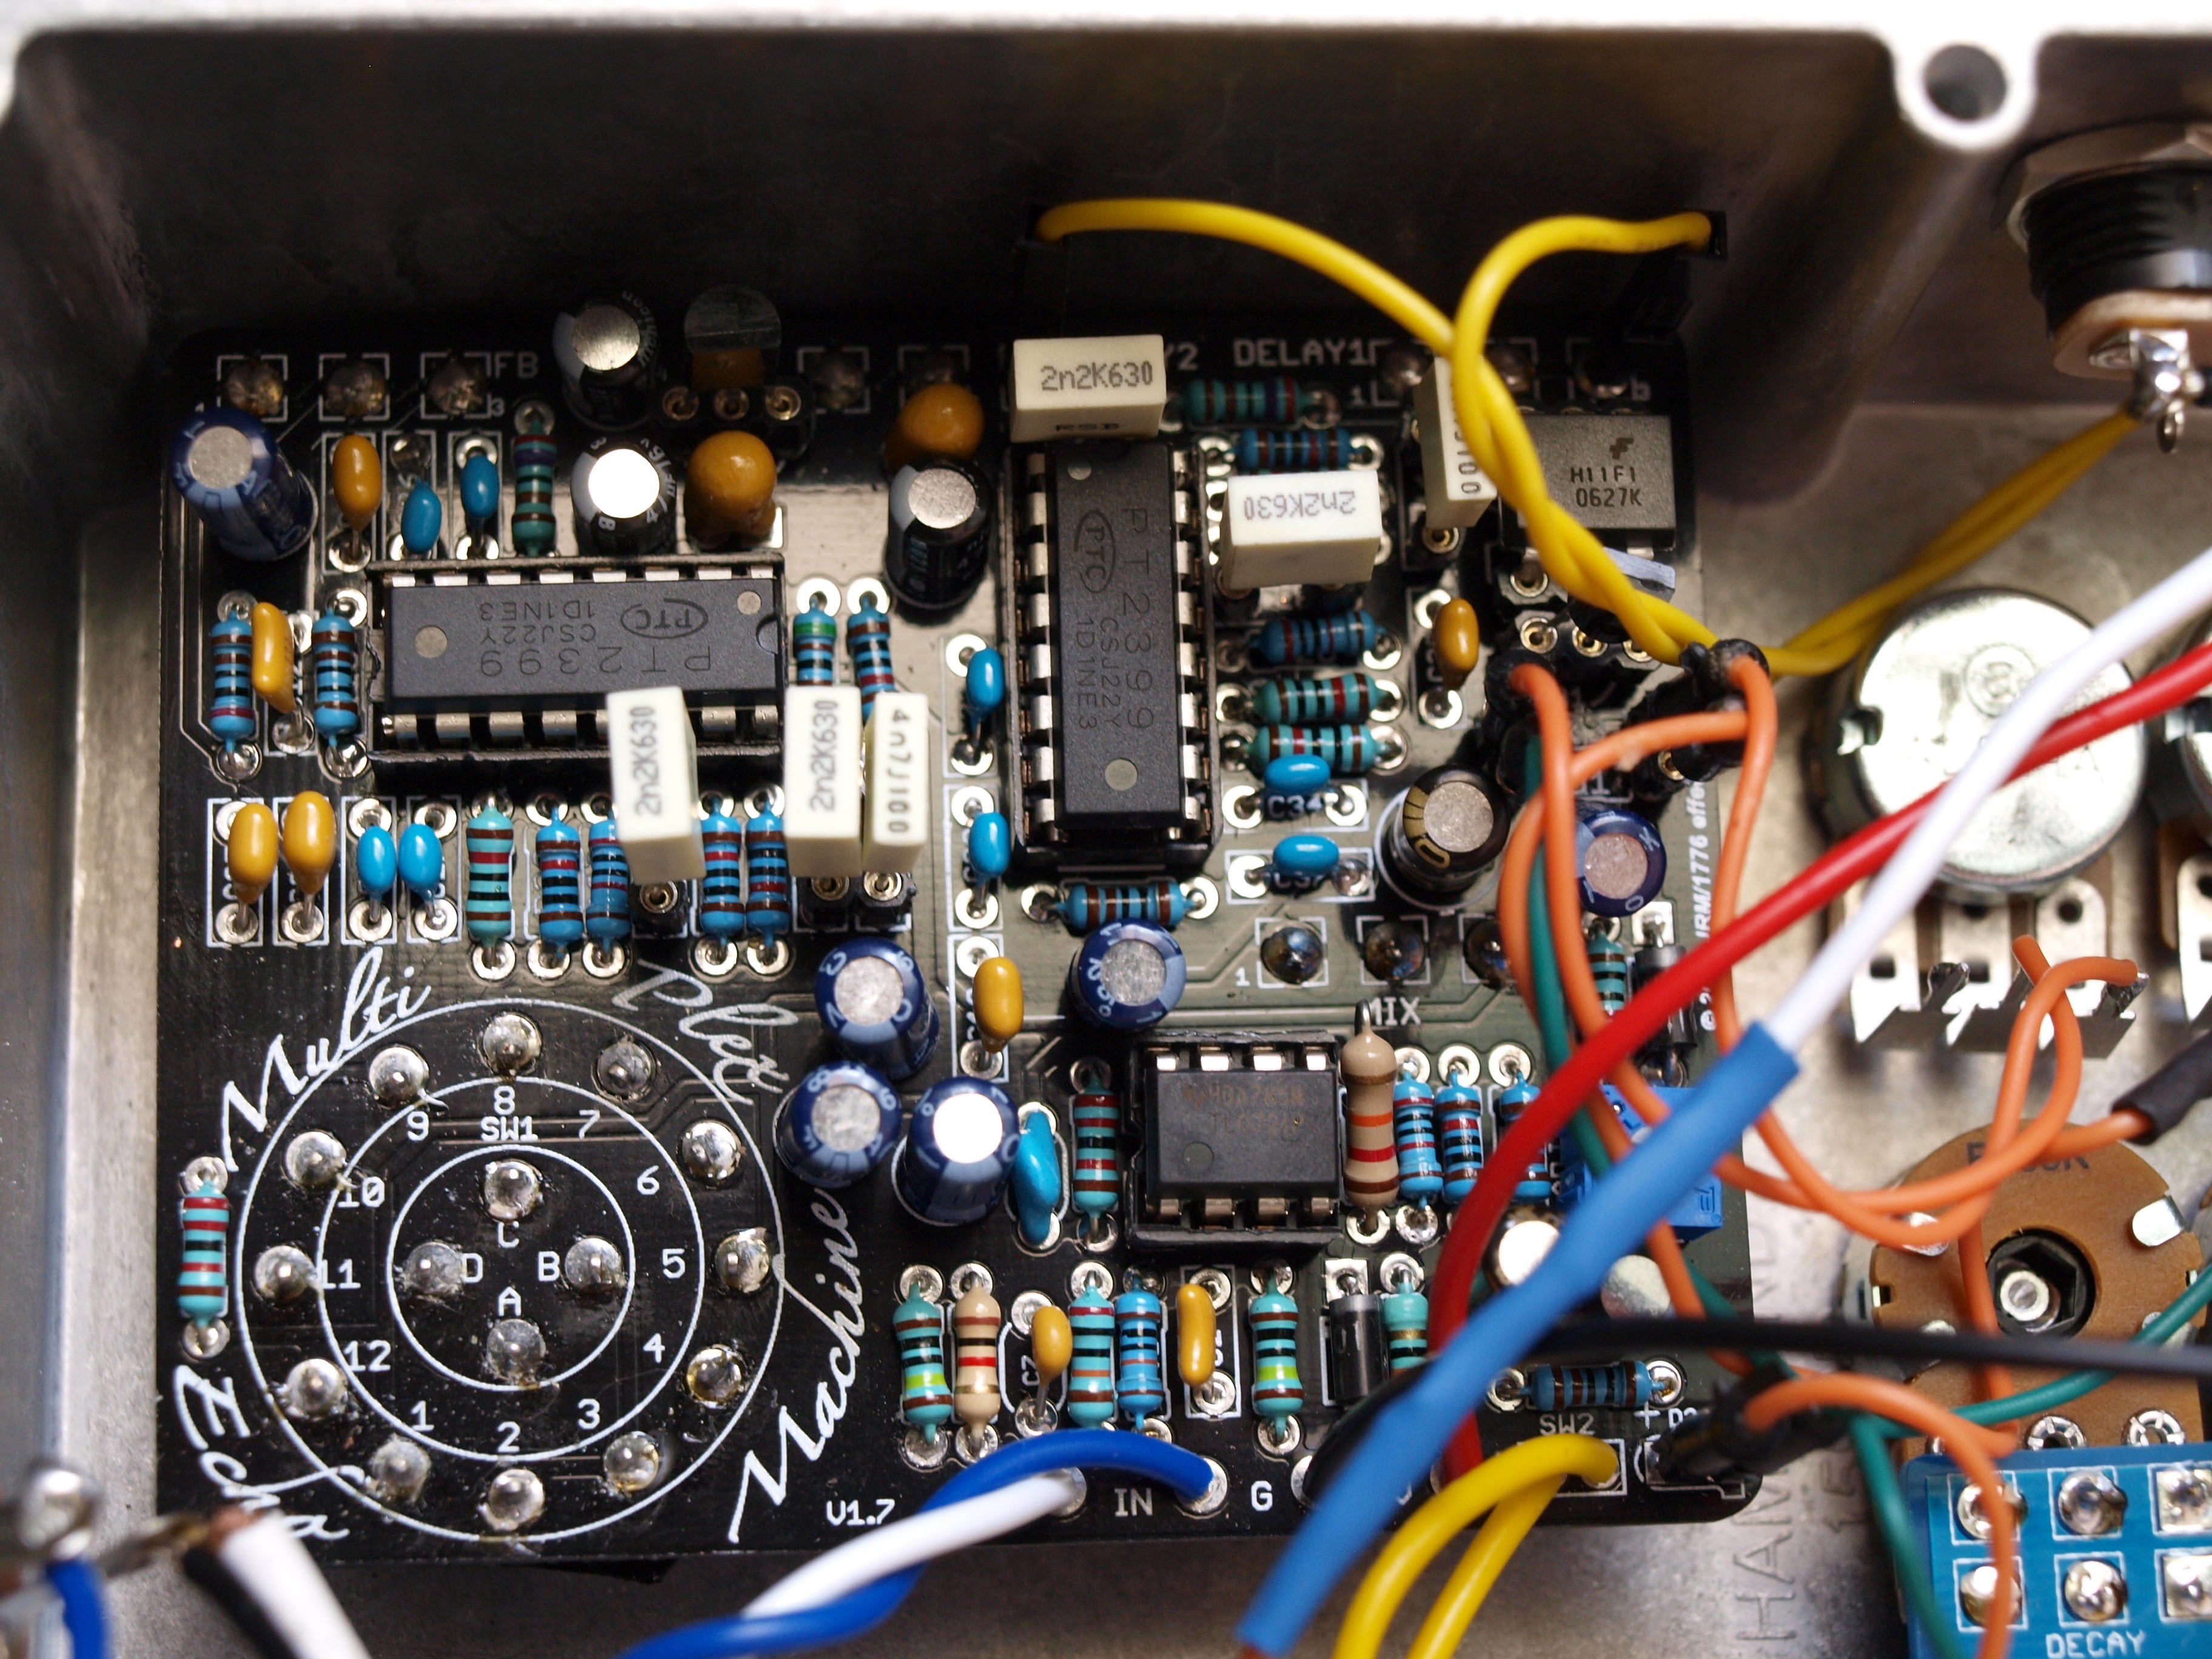
We took our time with this board - double checking the resistor and capacitor values as they went in. In the end only one resistor ended up in the wrong place, which was rescuable.
I decided to socket some of the capacitors - at the time I only had some cheap eBay ceramic caps to put in there, and wasn't sure how they would perform. Later on they got replaced with film caps. The ceramics sounded fine, but funnily enough their pins are so thin that they slid around in the sockets. At one point I noticed that the pedal was sounding a bit distorted - one of the capacitors had flung itself out of its socket and was discovered about an hour later embedded in the carpet under the couch. I went with 2.2nF capacitors in C13, C19, C22 and C28 for slightly less noise.
It all tested OK before putting it in the enclosure, but once boxed up I found that only one of the delay chips was working. Debugging that problem was fun. In EP-3 mode it worked as expected, but in RE-201 mode it was still a single echo, and in Binson mode there was no output at all, or very distorted output, depending on the value of Delay 1 pot. So something was wrong with the Delay 1 chip.
I swapped the delay chips around, and the problem persisted, so it wasn't the chip itself. Tracing the circuit with a multimeter around the rotary switch showed that the signal was getting to both delay chips correctly.
Measuring the voltages on IC2 looked good compared to values on Madbean forums, but the values on pins 9-16 of IC3 were way off.
I then pulled out the IC3 and all the capacitors that I'd socked, and checked the continuity of each end of all the resistors and capacitors against the schematic. This showed that R24 had a bad solder joint - there should have been 10k between C14 and IC3 pin 15 via R24, but there was no connection. Reflowing the solder on that one resistor fixed the pedal.
We added in sockets for the tape speed ramp and release resistors (R31, R33), and then ended up connecting them to pots mounted on the enclosure. I'm still not sure if it was worth it, but you can get different tape speed weirdness by fiddling them around.
MP Modulation add-on
This one is a tiny board - my kid was disappointed as there wasn't much soldering for him to do.
I used a DPDT on-off-on switch for turning on the modulation - one pole for connecting the modulation out to either delay circuit, and the other pole is used to disconnect the power from the modulation board when in the middle switch position. This means that the external indicator LED for the modulation will only be running when modulation is on.
Enclosure and finishing
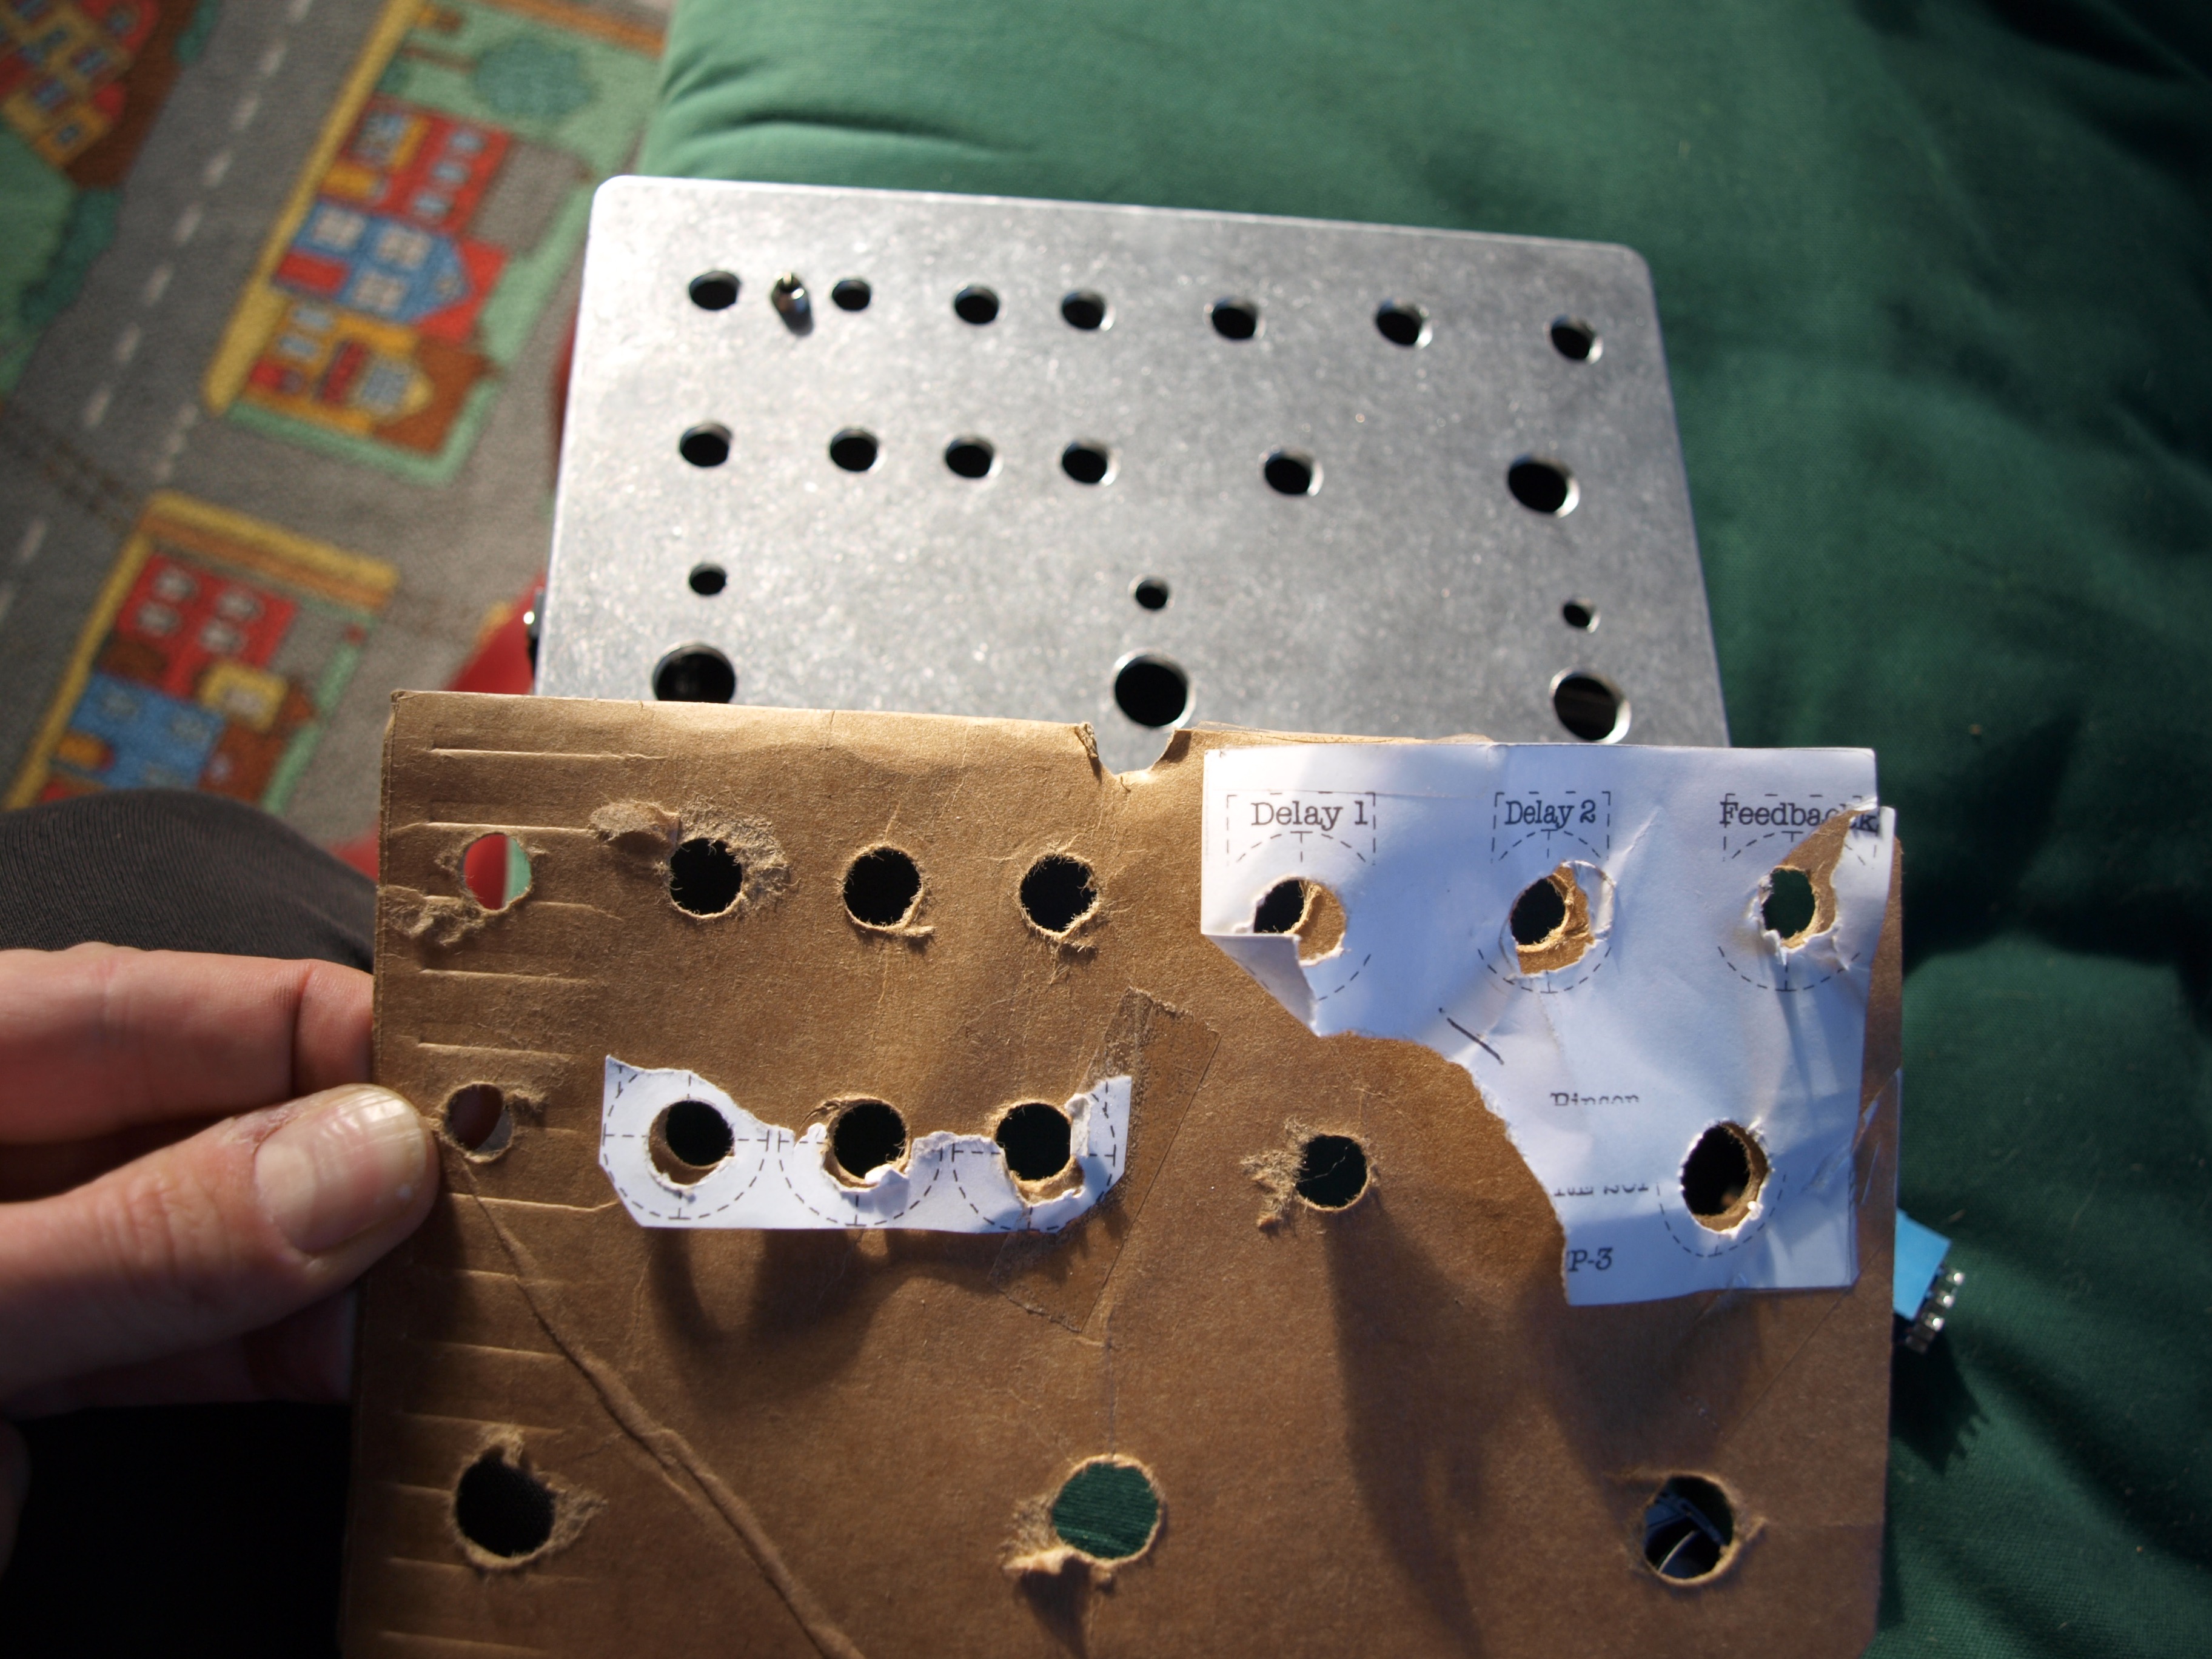
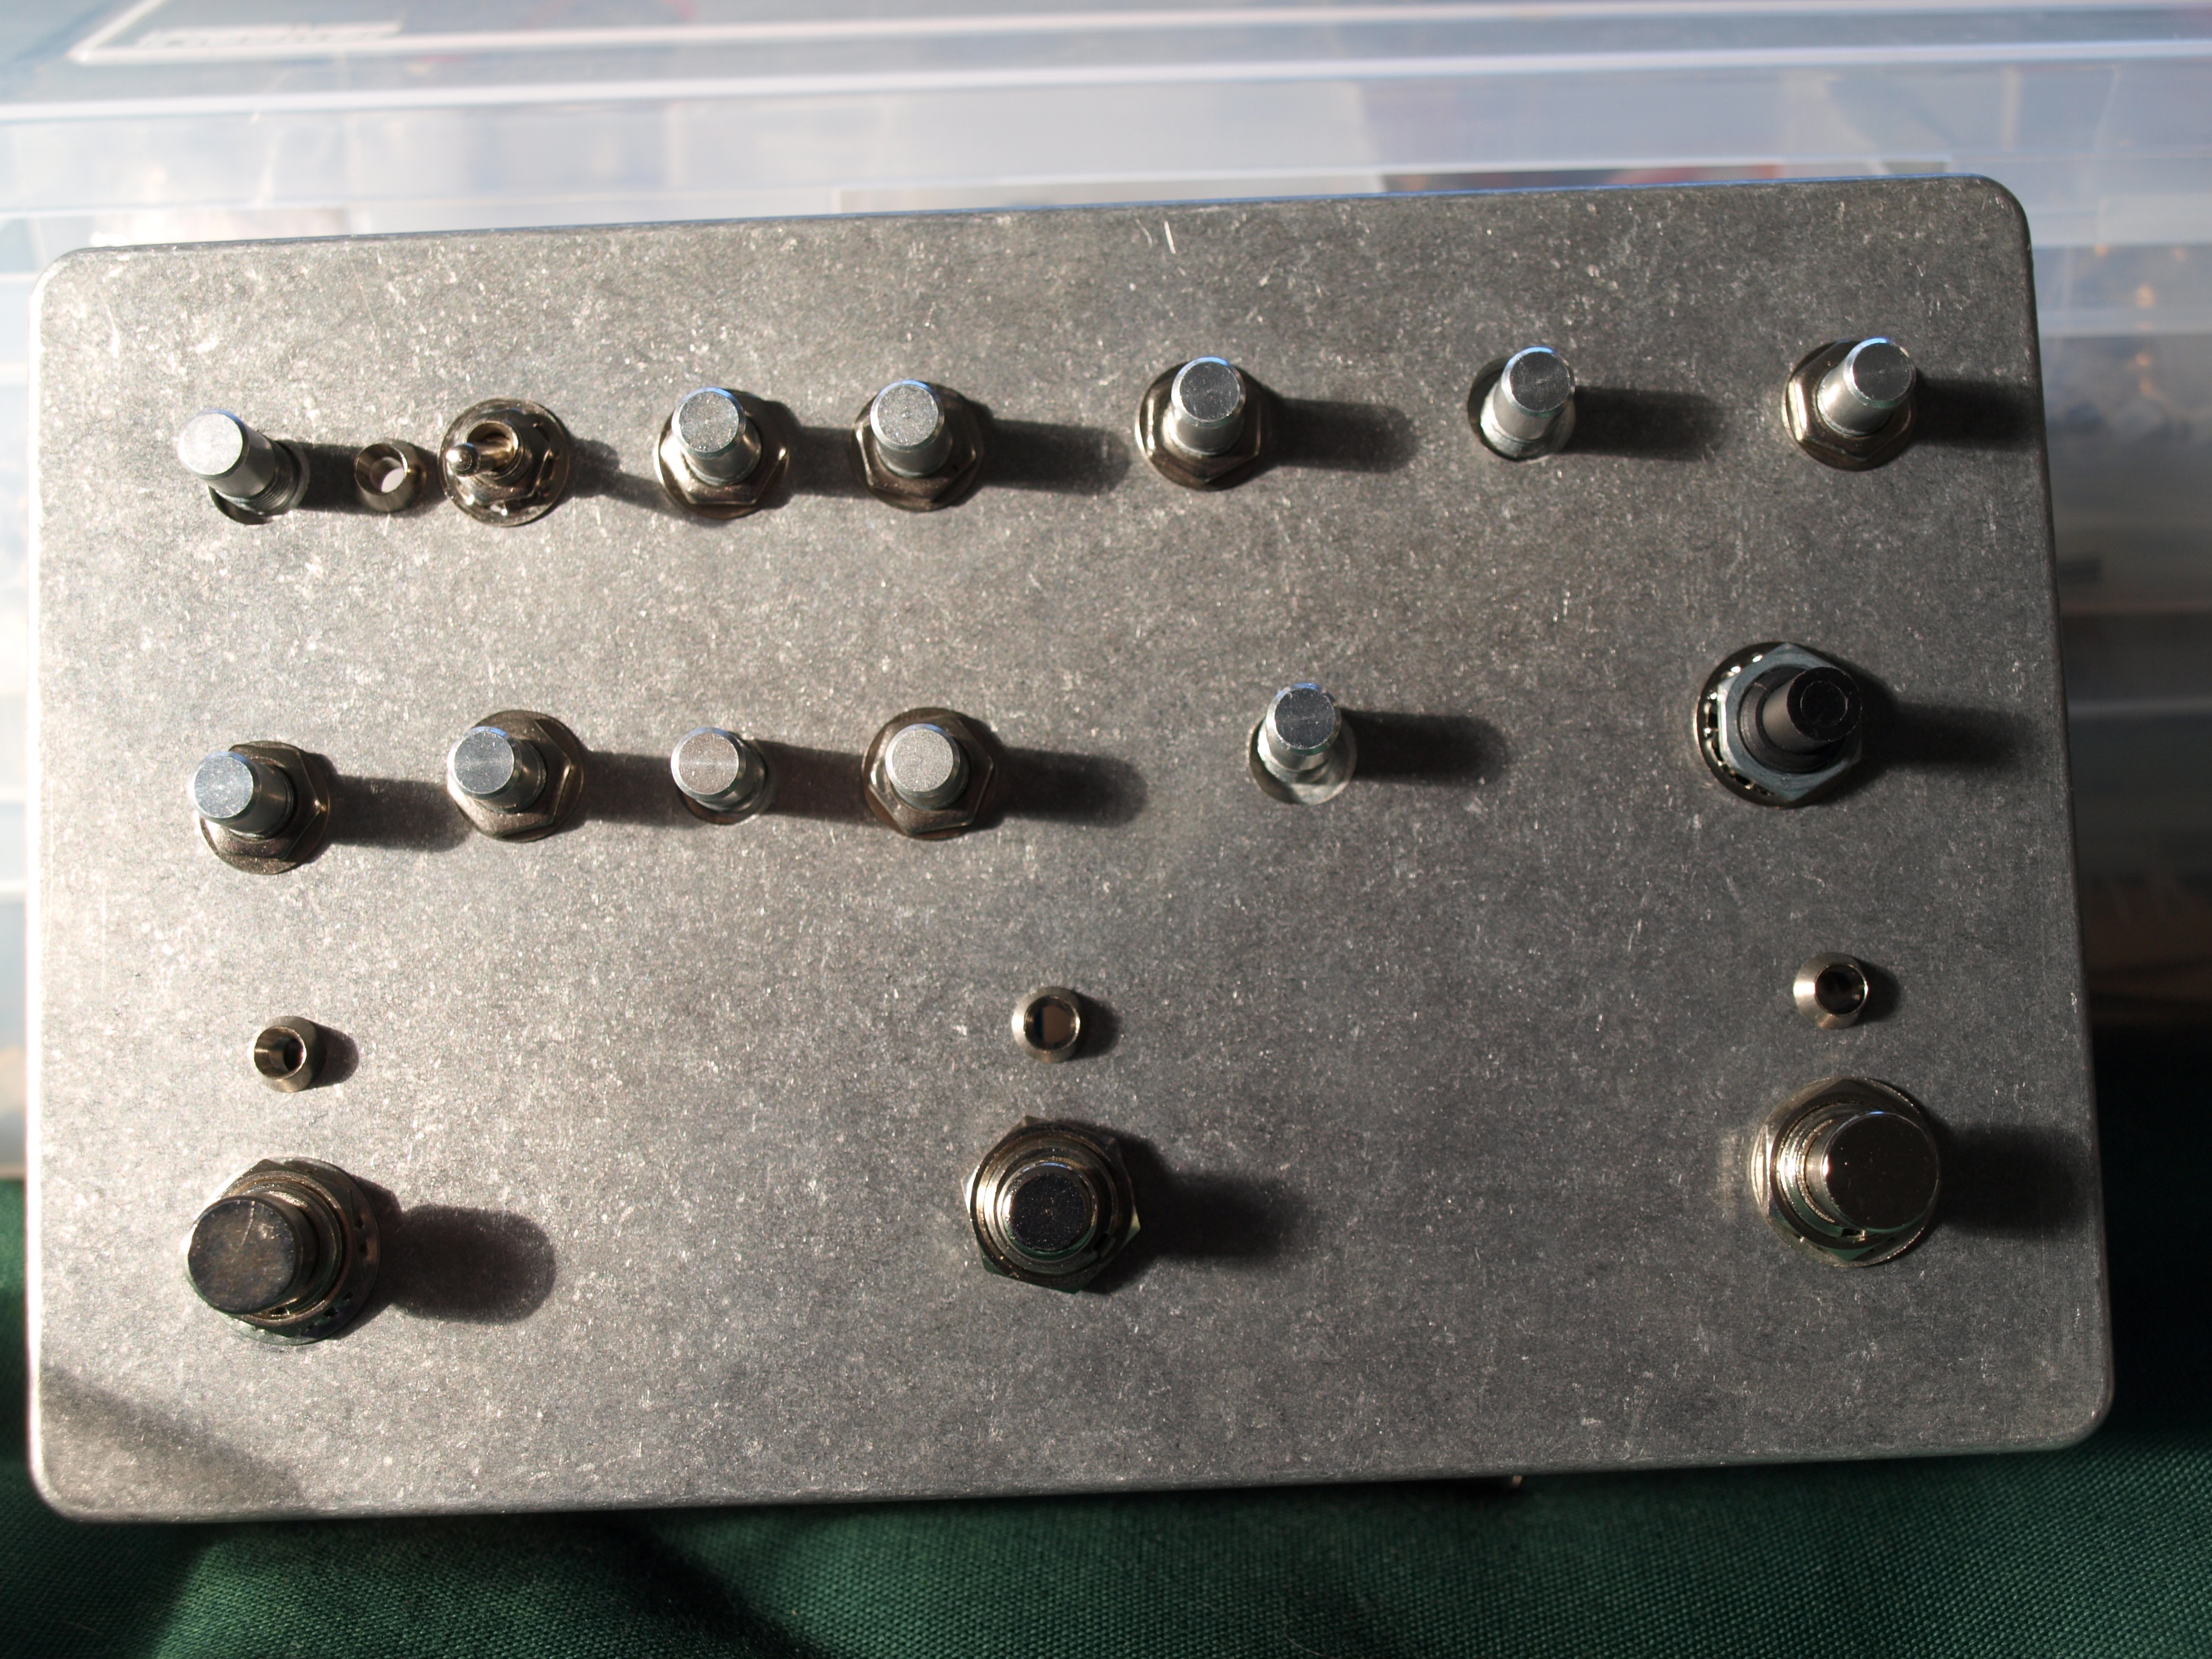
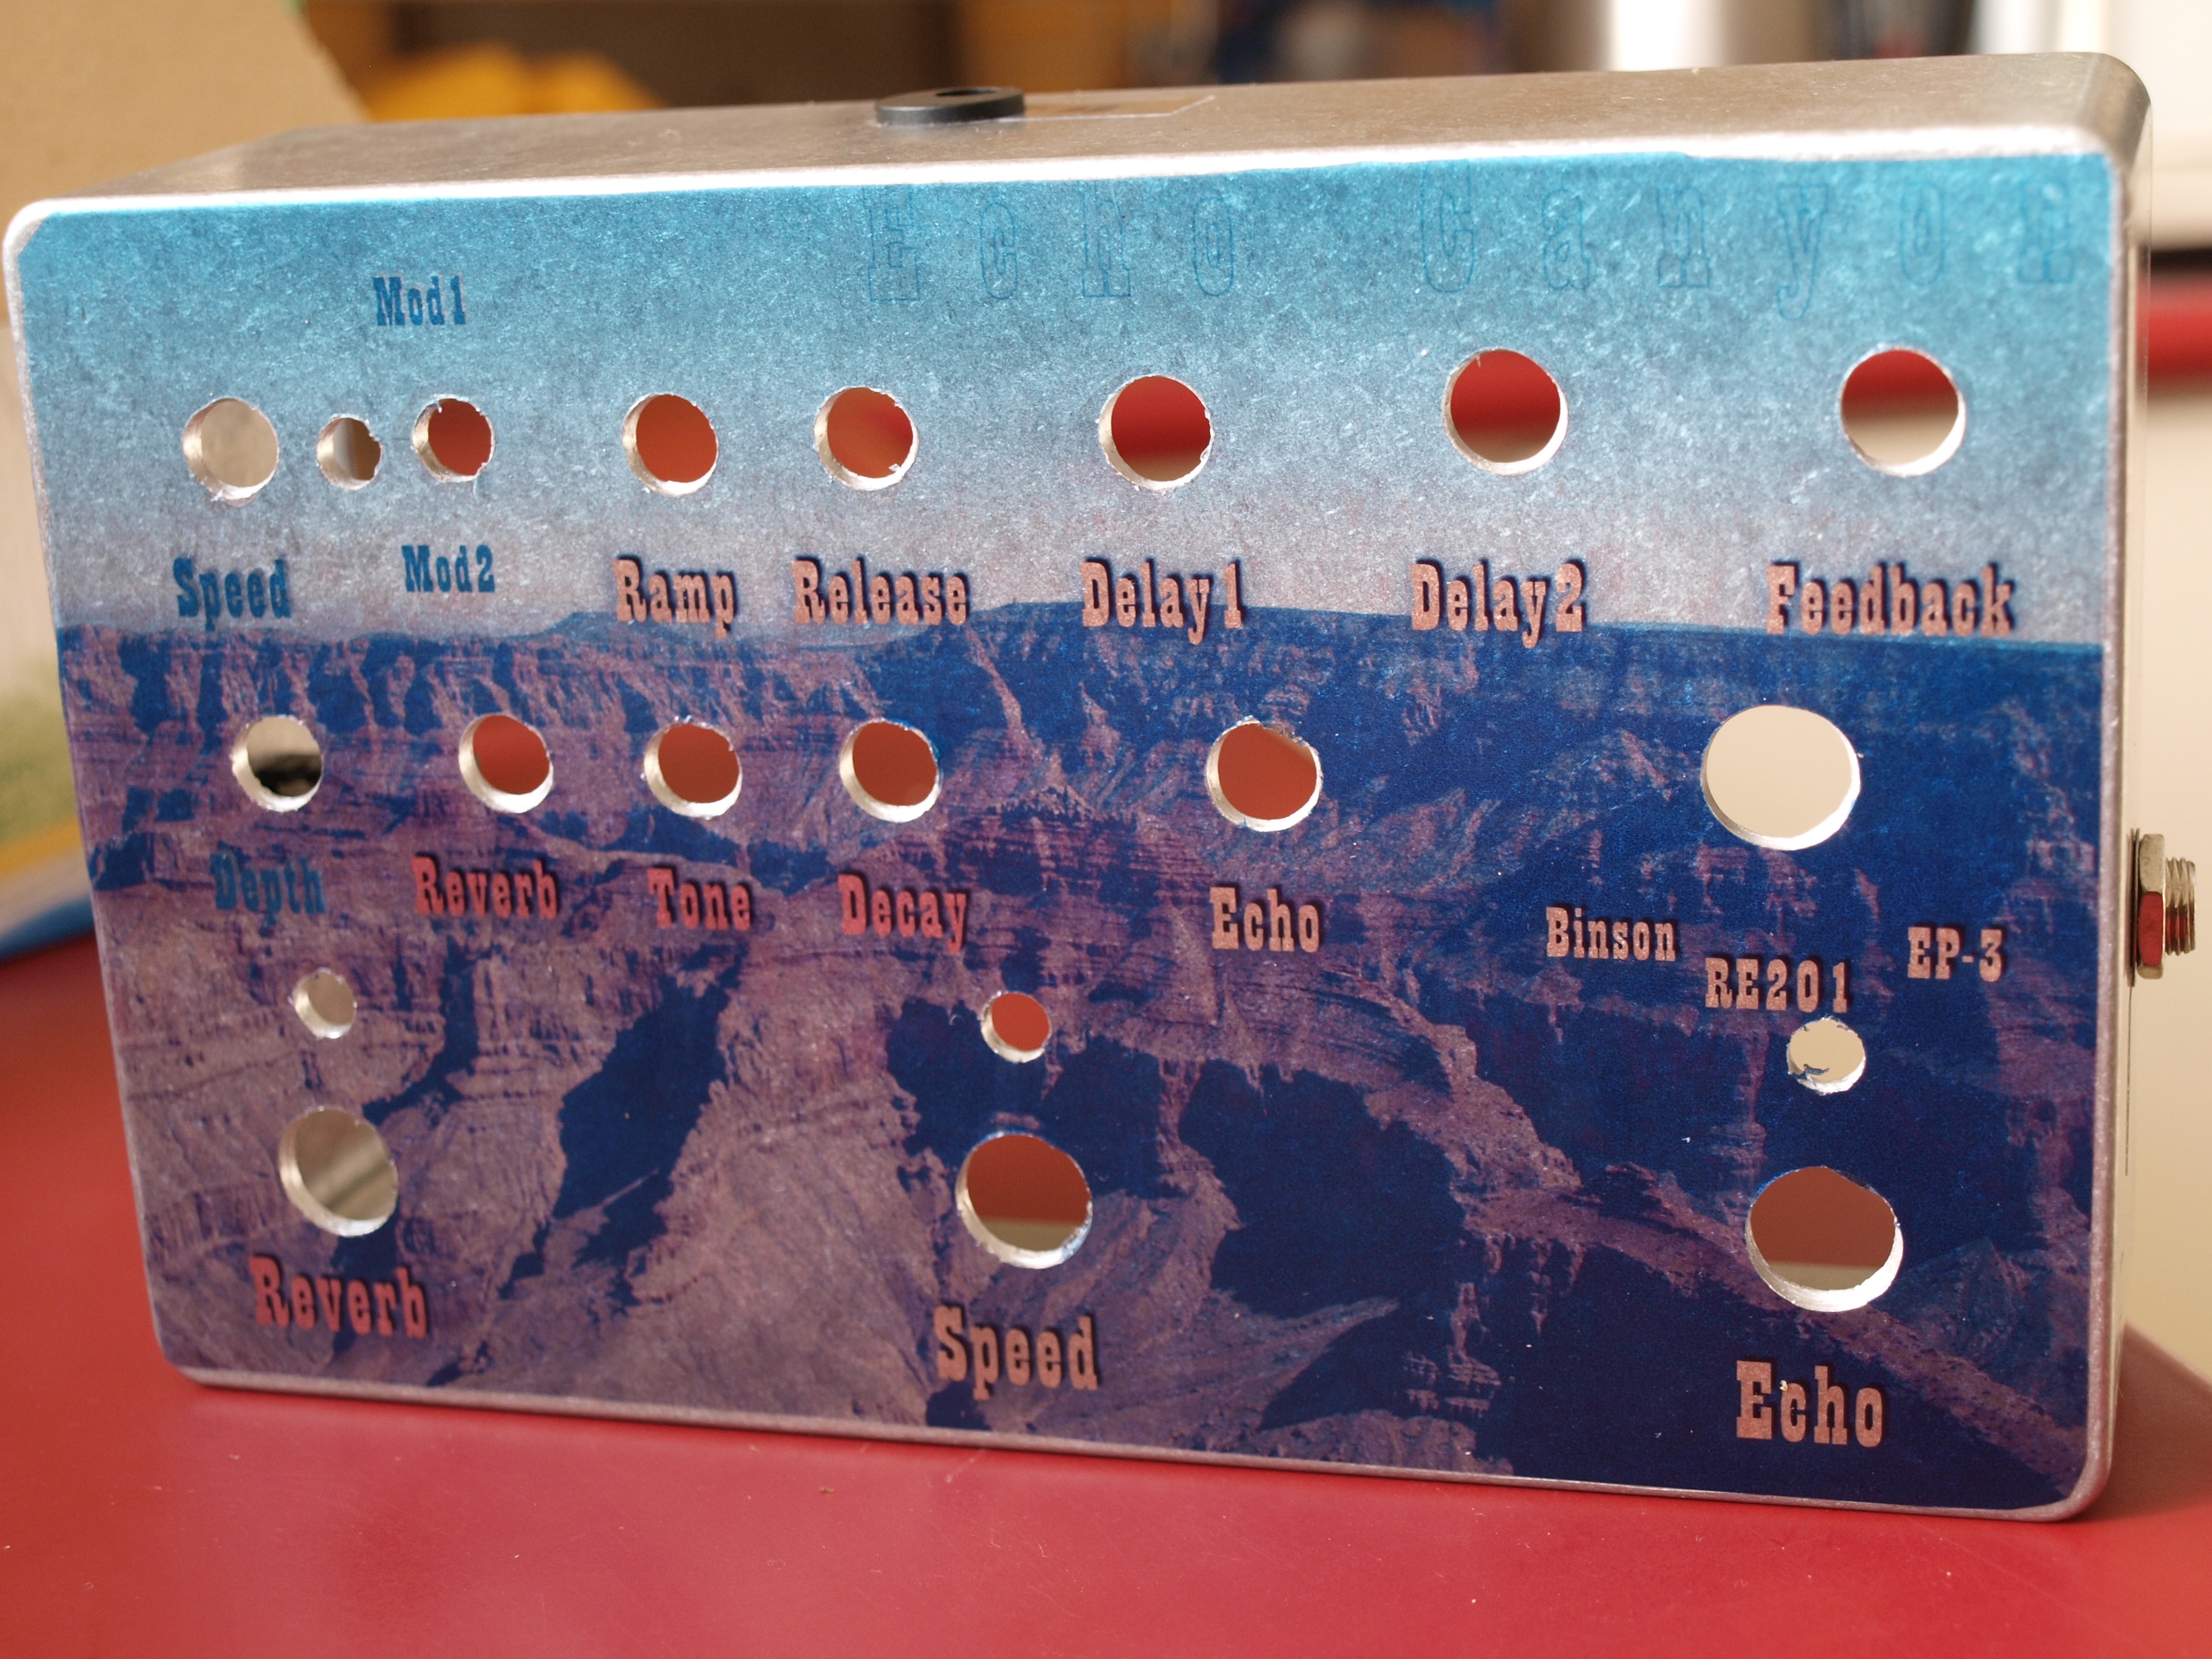
The enclosure is a Hammond 1590DD - heaps of room for the boards inside, but it needed to be that big to fit all the knobs and switches. The knobs are aluminium with the marker actually cut through the body of the knob - they're quite neat, and a bit classier than the usual cheap plastic eBay knobs I use...
The drilling went OK, but I reckon some of the knobs are not quite lined up. Oh well.
Photo printed on inkjet clear vinyl sticky paper. The photo is of the Grand Canyon, from a holiday we took to the USA a few years back. Their government was having conniptions so every museum and National Park that we wanted to visit was closed for the three weeks we were in the country. This photo is the closest we got to the Grand Canyon - by helicopter, as the airspace over the Canyon wasn't closed, but the Canyon was.

Reverb - Master of Puppets
Echo - single echo - Zombie
Echo - RE201 dual echo - using it to play the Dr. Who theme
Echo with modulation settings really badly adjusted. Sweet Child o' Mine never sounded so seasick... but my 9 year old thinks it is hilarious. :-/